Every Android device comes with a collection of standard fonts: Droid Sans, Droid Sans Mono and Droid Serif. They were designed to be optimal for mobile displays, so these are the three fonts you will be working with most of the time and they can be styled using a handful of XML attributes. You might, however, see the need to use custom fonts for special purposes. We’ll be taking a look at that as well in this quick tip.
Font Style Attributes
In the following section we’re going to examine the different XML attributes that you can use to style components with text. If you wish to follow along, then setup a new Android project in your IDE of choice and open up your main.xml layout file.
Typeface
As stated in the overview, there are three different default typefaces which are known as the Droid family of fonts: sans, monospace and serif. You can specify any one of them as the value for the android:typefaceattribute in the XML declaration of a component that supports text styling, such as TextView. Here’s an example of all three typefaces in action:
- xml version="1.0" encoding="utf-8"?>
- <LinearLayout xmlns:android="http://schemas.android.com/apk/res/android"
- android:orientation="vertical"
- android:layout_width="fill_parent"
- android:layout_height="fill_parent"
- >
- <TextView
- android:layout_width="fill_parent"
- android:layout_height="wrap_content"
- android:text="This is a 'sans' demo!"
- android:typeface="sans"
- />
- <TextView
- android:layout_width="fill_parent"
- android:layout_height="wrap_content"
- android:text="This is a 'serif' demo!"
- android:typeface="serif"
- />
- <TextView
- android:layout_width="fill_parent"
- android:layout_height="wrap_content"
- android:text="This is a 'monospace' demo!"
- android:typeface="monospace"
- />
- LinearLayout>
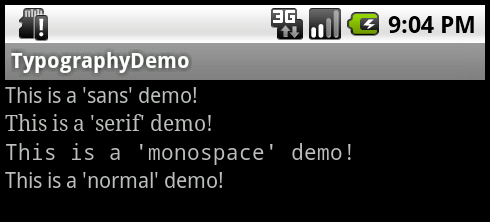
In addition to the above, there is another attribute value named “normal” which defaults to the sans typeface.
Text Style
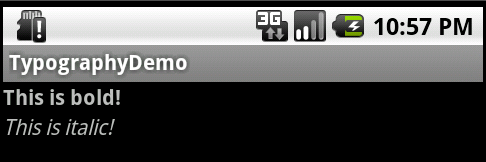
The android:textStyle attribute can be used to put emphasis on text. The possible values are: normal, bold, italic. You can also specify bold|italic.
- <TextView
- android:layout_width="fill_parent"
- android:layout_height="wrap_content"
- android:text="This is bold!"
- android:textStyle="bold"
- />
Text Size
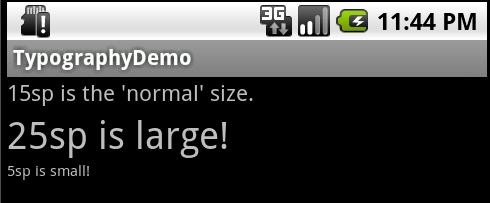
android:textSize specifies the font size. Its value must consist of two parts: a floating-point number followed by a unit. Available units are: sp (scaled pixels), px (pixels), dp (density-independent pixels), in (inches), mm (millimeters). It is generally a good practice to use the sp unit so the size can scale depending on user settings.
- <TextView
- android:layout_width="fill_parent"
- android:layout_height="wrap_content"
- android:text="15sp is the 'normal' size."
- android:textSize="15sp"
- />
Text Color
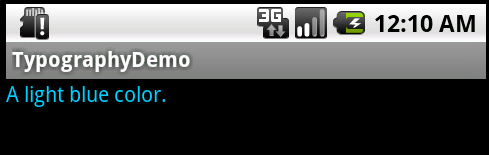
The android:textColor attribute’s value is a hexadecimal RGB value with an optional alpha channel, similar to what’s found in CSS and can be in one of the following formats:
- #RGB
- #ARGB
- #RRGGBB
- #AARRGGBB
You can also reference a color declaration using @color/color_name.
- <TextView
- android:layout_width="fill_parent"
- android:layout_height="wrap_content"
- android:text="A light blue color."
- android:textColor="#00ccff"
- />
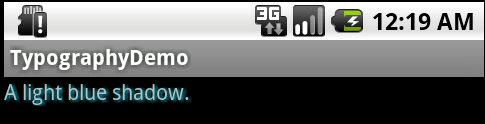
Text Shadow
You can use three different attributes to customize the appearance of your text shadow:
- android:shadowColor Shadow color in the same format as textColor.
- android:shadowRadius Radius of the shadow specified as a floating point number.
- android:shadowDx The shadow’s horizontal offset specified as a floating point number.
- android:shadowDy The shadow’s vertical offset specified as a floating point number.
The floating point numbers don’t have a specific unit – they are merely arbitrary factors.
- <TextView
- android:layout_width="fill_parent"
- android:layout_height="wrap_content"
- android:text="A light blue shadow."
- android:shadowColor="#00ccff"
- android:shadowRadius="1.5"
- android:shadowDx="1"
- android:shadowDy="1"
- />
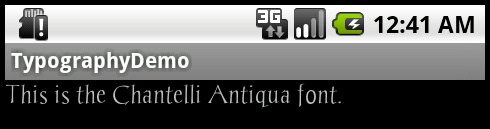
Using Custom Fonts
Lastly we’re going to examine the process of using custom fonts. We’ll use this font for demonstration purposes. Download it and place the TTF file in the ./assets directory (create it if it doesn’t exist yet).
We’re going to use a basic layout file with a TextView, marked with an id of “custom_font” so we can access it in our code.
- xml version="1.0" encoding="utf-8"?>
- <LinearLayout xmlns:android="http://schemas.android.com/apk/res/android"
- android:orientation="vertical"
- android:layout_width="fill_parent"
- android:layout_height="fill_parent"
- >
- <TextView
- android:id="@+id/custom_font"
- android:layout_width="fill_parent"
- android:layout_height="wrap_content"
- android:text="This is the Chantelli Antiqua font."
- />
- LinearLayout>
Open your main activity file and insert this into the onCreate() method:
- TextView txt = (TextView) findViewById(R.id.custom_font);
- Typeface font = Typeface.createFromAsset(getAssets(), "Chantelli_Antiqua.ttf");
- txt.setTypeface(font);
The Typeface class contains a static builder method createFromAsset, which takes an AssetManager as its first parameter and a path to the file in the second argument. We’re handing it the default asset manager and the name of the font file because it’s located in the root of the “assets” folder. Once we’ve got an instance of our custom typeface, all that’s left is a call to TextView’s setTypeface() method. Simple, huh? It might also be wise to organize your fonts into a subdirectory if your assets directory is packed with other files.
There are a few potential problems that custom typefaces come with, though. Ellipsizing might not work correctly if the font doesn’t have a glyph for the special ellipsis character and internationalization might not be supported, as your font would have to handle any language that users might input. You’ll also want to keep an eye on the total size of your custom fonts, as this can grow quite large if you’re using a lot of different typefaces.
Conclusion
This quick tip has shown you the different options that are available to you for customizing default Droid fonts. You have also learned how to include and use custom typefaces in your application. Just remember to ensure that any custom font you may be using has a license that grants you permission to use it for these purposes!